

News
Top Ten Common Faults and Troubleshooting Techniques for Pneumatic Pad Printing Machines
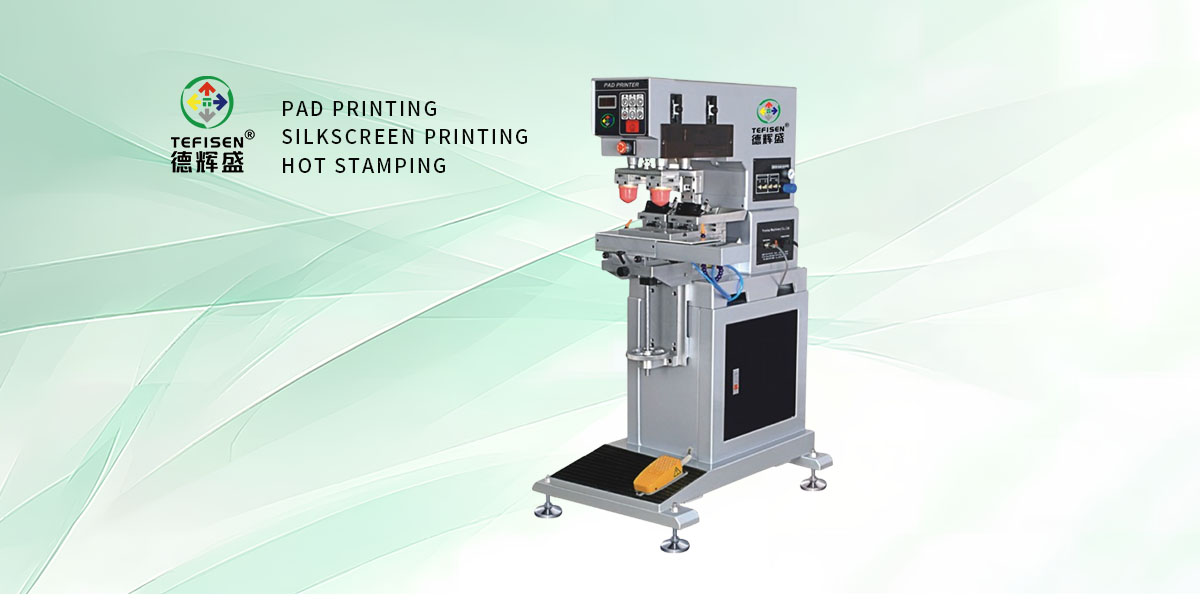
The pneumatic tampon printing machine is a vital printing equipment with widespread applications in industrial production. However, due to various reasons, the pneumatic tampon printing machine may encounter various faults, affecting production efficiency and print quality. This article will elaborate on the top ten common faults and troubleshooting methods for pneumatic tampon printing machines, along with daily maintenance and usage tips, to assist operators in better maintaining and utilizing these machines.
I. Top Ten Faults and Troubleshooting Methods for Pneumatic Tampon Printing Machines:
Fault 1: Control Panel Does Not Display Content
Causes:
• Poor contact of the main power cord: A common issue caused by loose or oxidized connections between the power cord plug and socket.
• Damaged power switch: The power switch may be damaged due to prolonged use or external impact.
• Blown fuse: The fuse, a crucial circuit protection component, blows to protect the circuit in case of excessive current.
Repair Methods:
• Check the power cord: Ensure there is no looseness or oxidation at the connection between the power cord plug and socket. Clean or replace as necessary.
• Replace the power switch: If damaged, promptly replace the power switch.
• Replace the fuse: Replace the blown fuse with a new one.
Fault 2: Control Panel Displays, but Stops Responding After Movement
Causes:
• Incomplete stroke: The pneumatic tampon printing machine's stroke may not be fully completed, preventing the proximity switch from sensing.
• Damaged proximity switch: The proximity switch can malfunction due to prolonged use or external impact.
• Loose or shifted induction metal plate: The metal plate may loosen or shift due to machine vibrations, preventing the proximity switch from triggering.
• Damaged solenoid valve controlling the head's forward/backward motion: The valve can malfunction due to prolonged use or external impact.
• No DC-12V voltage output to the solenoid valve from the circuit board: The circuit board may have failed.
• Damaged IC chip: The IC chip can be damaged from prolonged use or external impact.
Repair Methods:
• Check the stroke: Ensure the pneumatic tampon printing machine's stroke is fully completed. Adjust as necessary.
• Check the proximity switch: Replace the proximity switch if damaged.
• Check the induction metal plate: Adjust if loose or shifted.
• Check the solenoid valve: Replace if damaged.
• Check the circuit board: Repair or replace the circuit board if faulty.
• Replace the IC chip: Replace the damaged IC chip.
Fault 3: Control Panel Displays, but No Action Occurs
Causes:
• Damaged solenoid valve: The valve may malfunction due to prolonged use or external impact.
• Damaged foot switch: The foot switch can malfunction due to prolonged use or external impact.
• No air pressure from the external air supply: The external air supply may have failed.
• Air pressure conversion switch not turned on: The switch may be in the off position.
• Air pressure gauge shows no pressure: The gauge may be faulty.
• Air flow adjustment valve not opened: The valve may be closed.
• Mechanical jamming: The machine may have jammed due to prolonged disuse or inadequate maintenance.
Repair Methods:
• Check the solenoid valve: Replace if damaged.
• Check the foot switch: Replace if damaged.
• Check the external air supply: Ensure there is air pressure. Repair if necessary.
• Turn on the air pressure conversion switch.
• Check the air pressure gauge: Repair if not indicating pressure.
• Open the air flow adjustment valve.
• Check the machinery: Repair if jammed.
Fault 4: Control Panel Display Is Chaotic, Indicator Lights Do Not Blink Normally
Causes:
• Damaged IC chip: The IC chip may be damaged from prolonged use or external impact.
• Incorrect wiring sequence of proximity switches controlling up, down, forward, and backward movements: The wiring may be misconfigured.
Repair Methods:
• Replace the IC chip: Replace if damaged.
• Check the wiring sequence of proximity switches: Adjust if incorrect.
Fault 5: Machine Does Not Scrape Ink, No Lower Scraper Blade Action
Causes:
• Insufficient scraping pressure: The scraping pressure may be insufficient.
• Incomplete stroke: The machine's stroke may not be fully completed.
• Disconnected air tube: The air tube may be disconnected.
• Seized cylinder guide shaft: The guide shaft may be jammed.
Repair Methods:
• Adjust the scraping pressure: Ensure it is appropriate.
• Check the stroke: Ensure it is fully completed. Adjust if necessary.
• Check the air tube: Repair if disconnected.
• Check the cylinder guide shaft: Repair if jammed.
Fault Six: No Printing Action from the Printing Head
1. Causes:
o Damaged Control Buttons: The control buttons may be damaged, preventing the printing action.
o Malfunctioning Proximity Switch: The proximity switch may be faulty, unable to sense.
o Damaged Solenoid Valve: The solenoid valve may be damaged, causing a lack of air supply.
o Stuck Cylinder Guide Shaft: The cylinder guide shaft may be jammed, preventing movement.
o Defective IC Chip: The IC chip may be defective, leading to control failure.
2. Repair Methods:
o Replace Control Buttons: Replace the damaged control buttons.
o Replace Proximity Switch: Replace the faulty proximity switch.
o Replace Solenoid Valve: Replace the damaged solenoid valve.
o Repair Cylinder Guide Shaft: Repair the jammed cylinder guide shaft.
o Replace IC Chip: Replace the defective IC chip.
Fault Seven: Machine Operation Not Smooth
1. Causes:
o Air Leakage in Cylinder: The cylinder may have internal air leakage, resulting in insufficient pressure.
o Lack of Lubrication on Guide Shaft: The guide shaft may lack lubrication, increasing friction.
o Insufficient or Low Air Volume: The air volume may be insufficient or set too low, causing pressure issues.
o Poor Solenoid Valve Conversion: The solenoid valve may not convert properly, affecting air supply.
2. Repair Methods:
o Check Cylinder: Inspect the cylinder for internal air leakage and repair if necessary.
o Apply Lubricant: Add lubricant to the guide shaft.
o Adjust Air Volume: Adjust the air volume to an appropriate level.
o Repair Solenoid Valve: Repair the solenoid valve.
Fault Eight: Vibrations and Impacts During Machine Operation
1. Causes:
o Weak Buffer Oil Top: The buffer oil top may be weak, failing to cushion and dampen vibrations.
o Excessive Air Pressure Adjustment: The air pressure may be set too high, causing vibrations and impacts.
2. Repair Methods:
o Replace Buffer Oil Top: Replace the weak buffer oil top.
o Adjust Air Pressure: Adjust the air pressure to an appropriate level.
Fault Nine: Continuous Operation Despite Stop Command
1. Causes:
o Sticky Start Button: The start button may be sticky, preventing it from stopping.
o Foot Switch Stuck in Closed Position: The foot switch may not release after activation, causing continuous operation.
2. Repair Methods:
o Repair Start Button: Repair the sticky start button.
o Repair Foot Switch: Repair the foot switch to ensure proper release.
Fault Ten: Air Leakage
The pneumatic pad printing machine relies on its pneumatic system, with interface pipes being crucial components. Hardening or aging of interface pipes can lead to reduced sealing performance, causing air leakage. Additionally, unstable air pressure and aging or poorly sealed cylinders with internal debris can also contribute to air leakage. Regular inspections of the pneumatic system are essential, with timely replacements of aged components and cleaning.
II. Routine Maintenance
1. Daily Maintenance:
o Drain Water Separator: Drain the water separator to prevent clogging.
o Check Slide Rail Lubrication: Ensure proper lubrication of slide rails for smooth operation.
o Pre-operation Inspection: Check for obstructions in the machine's operating area before starting.
o Clean Machine Surface: Keep the machine surface clean and tidy.
2. Weekly Maintenance:
o Lubricate and Oil the Entire Machine: Ensure smooth operation by lubricating and oiling the machine.
o Inspect and Tighten Mechanical Parts: Check and tighten mechanical parts for stability.
o Check Metal Sensing Plates and Proximity Switches: Ensure they are not loose or misaligned.
o Check and Adjust Air Pressure: Verify air pressure gauge readings and adjust as needed.
o Clean Machine Interior and Exterior: Remove dust, ink, and debris from both sides of the machine.
3. Monthly Maintenance:
o Inspect Wear and Tear: Check for wear on parts like blades and steel plates, replacing as necessary.
o Inspect Electrical System: Verify the integrity of wires, plugs, and switches, repairing or replacing damaged components.
o Inspect Pneumatic System: Check for leaks or damage in cylinders, air tubes, and pressure reducing valves, repairing or replacing as needed.
o Comprehensive Cleaning and Maintenance: Thoroughly clean and maintain the machine, including internal ink and dust removal, and verifying the functionality of all components.
III. Operation Tips for Pneumatic Pad Printing Machines
• Choose the Right Ink: Select suitable ink based on the printing material and requirements to ensure print quality and adhesion.
• Adjust Squeegee Pressure: Optimize squeegee pressure to achieve the best ink scraping effect with minimal pressure, prolonging the lifespan of the steel plate and blade.
• Adjust Printing Speed: Adapt the printing speed according to the ink's drying rate and the requirements of the printing material to ensure both print quality and production efficiency.
• Regular Maintenance: Routinely maintain the machine, including cleaning, lubricating, and tightening, to ensure smooth operation and extend its service life.
• Prioritize Safe Operation: During the operation of the pneumatic pad printing machine, prioritize safety by avoiding contact with hot parts and preventing electrical shocks.
IV. Precautions
• Before using the pneumatic pad printing machine, thoroughly read the user manual to understand its capabilities and operation methods.
• Place the pneumatic pad printing machine on a stable workbench to prevent shaking and resonance.
• Pay attention to safety when operating the pneumatic pad printing machine, ensuring fingers or other objects are not caught by the machine.
• Regularly conduct maintenance and servicing, such as cleaning, lubricating, and tightening, to ensure the machine's normal operation and prolong its service life.
• When replacing ink, steel plates, or other components, first turn off the power and follow operational procedures.
• In case of any malfunction or abnormality during use, immediately cease operation and notify maintenance personnel for repairs.
The above covers common faults and maintenance methods for pneumatic pad printing machines, hoping to be of assistance to you. When using pneumatic pad printing machines, pay attention to daily maintenance and upkeep to ensure their smooth operation and prolong their service life. Simultaneously, prioritize safety during operation to prevent accidents.
You might also be interested in these articles.
Pad Printing Steel Plate: The Precise Artistry of Modern Industrial Production
Pad Printing Machine Pricing